Showing posts with label crafty. Show all posts

Wednesday, July 18, 2012

Are You a Scrapper?

by Katie

If the answer is yes, please specify: do you fight in back alleys with wiry, deft speed? If so, then you're infinitely cooler than I am. If you put together little collage things of photos, ticket stubs, and old birthday cards to put in albums, then you and I have more in common and we both have significantly less street cred.

Regardless of our respective levels of cool, I do enjoy making and keeping scrapbooks. They are artistic, visual accounts of certain periods in our lives, and in creating them we can (finally) make use of all those pictures we take and momentos we keep. (If you don't keep momentos per se, check your wallet/bottom of your purse and see what scraps of paper you can dig up.

Most of my scrapbook pages are filled with photographs and personal stuff--remember the day we went snorkeling? Went to the farmer's market? The week in Mexico? That friend's wedding/shower/housewarming/hospitalization?

There are times, however, when I want to make a good, old-fashioned collage and not feel like a weirdo by hanging it up on the fridge. I've found that scrapbooking gives me this opportunity. Thought I'd share this idea with you.

If you keep scrapbooks and you also keep magazines around because you're sure you'll somehow use them one day, here's a creative exercise: make "time capsule" pages that recall significant moments and your state of mind in the current year. Here are a few examples of this kind of thing.


I like throwing in a political cartoon here and there, some popular references that might prove humorous down the line, and little pictures/words to remind me of my current obsessions (note that Tina Fey doesn't make it onto a collage until 2012--I'm a little behind the times with my newfound love of 30 Rock).

Basically, this gives you something to do with all those old mags you've been saving for a crafty project and gives you an excuse to glue/tape together a bunch of random nonsense.

Happy scrapping!

Friday, April 13, 2012

Simple DIY coffee mugs.

by Crystal

I saw this originally on M loves M (which is an awesome blog, BTW). I loved the idea of taking some cute coffee mugs and making them your own.

What you'll need:
-Paint pen
-Clear spray concealer
-Coffee mugs
-A letter you like enough to put on your mugs

Let's emphasize the simple in this DIY post. I think the hardest part was going to JoAnn Fabrics and determining which paint pen and which spray I wanted to buy.

First, you'll take two coffee mugs. Preferably cute, inexpensive ones. I got mine at a consignment shop for $1.50.


Then, you'll write on the mugs with your cool new paint pen. I decided to go with "r" because my future last name will begin with that letter. But I could have done "c" for Crystal. Seriously. Choose whatever you want. Go crazy.


End product (drying on my balcony):


I only have one in the last picture because the first one I sprayed before the paint was dry, and it began running (down the mug, not away). I quickly wiped it off with a wet rag and was able to save it, but my impatience got the best of me and I needed to take a picture immediately after I finished. Baby steps, my friends. I can't expect these to go perfectly yet. I'm still a DIY newbie.

Saturday, March 3, 2012

Cold Saturday? Make Postcards!

by Katie

Cold Saturdays are a good time for drinking coffee, doing yoga, and making  postcards to send to your totally awesome entourage of friends and family.


This is a great upcyling project--you get to use the rando cardboard you have lying around your house (in the form of the almost-empty cracker/tampon/pepsi boxes I know you have) and the old magazines you've been hanging onto because you aren't done with them yet but won't ever actually read through again.

You can use: 
  • Any kind of thin cardboard--I seriously raided my recycling bin and scavenged for almost-empty boxes around my house
  • Any kind of paper or image--magazines, scrapbook paper, photographs, newspaper--whatever
  • Double-sided tape (of course)
  • Decorative tape/electrician's tape/duct tape/masking tap/scotch tape--this will cover the edges of your postcard, so choose according to your aesthetic
  • Crayons/markers
  • Plain paper or stationary to use for the writing side (especially if your cardboard doesn't have a plain side)
The good thing about postcards is that they can be pretty much any size (within reason). So cut up your cardboard into postcard-size rectangles.

Choose the images for your postcards. This is the fun part--you'll start seeing things in old magazines that jump out at you for different people. You can choose one large image per postcard or do some with a collage of smaller things. Alternatively, have some of your own photos printed and use those. They're your art!

Cover your postcards with the images/photos/paper you've chosen. This is why I love double-sided tape. I pretty much buy it in bulk these days. Make sure to cover the printed side of the cardboard, not the plain side. You'll use that for writing. You don't want to be writing on a glossy Nabisco box top.


Tape around the edges. You don't want two layers of paper, you want one cohesive postcard. Get creative with the taping. It can add to the look.


Then, your postcards are ready to be written on, adorned, and addressed! First things first: draw an address box in the bottom right corner, and draw yourself a little square for the stamp so you don't have to cover any of your writing with these necessities later.

Write message, fill in address, and then either go nuts with the crayons (or markers, or whatever floats your boat) or just leave it plain. If you're using crayons, write your note first or you'll be writing over wax. 

Some examples:


Your friends will be thrilled to get their totally original, personalized, awesome postcard in the mail from you. People love getting good mail. And people love knowing that something was handmade, just for them. I know this for a fact. Go--embrace the art of snail mail!


Sunday, February 26, 2012

Organize Your Undies!


 Hello, everyone. My name is Katie. 

You don't know me yet, but I'm about to show you my underwear.

I, like many of you, I'm guessing, have been living with a crazed, overspilling, and generally unfortunate underwear drawer for as long as I can remember. I don't even know half the stuff that's in there anymore. (Underwear drawers so easily exceed their purposed bounds, don't you think?) By the time I got around to addressing the issue, underwear itself was no longer the problem. The drawer had consumed both worn and unopened tights, sports bras, bathing suits, scarves, stray dress socks, concert tickets, old lipsticks...you name it, and I had shoved it in that drawer to deal with later.

Later has finally come.

The other day, putting away laundry, I found that I could no longer close said underwear drawer. And a small light flashed before my eyes, and I realized that I was disgusting. 

This was not okay.

So I decided to get my act together and make some sense of this drawer I go into day after day.

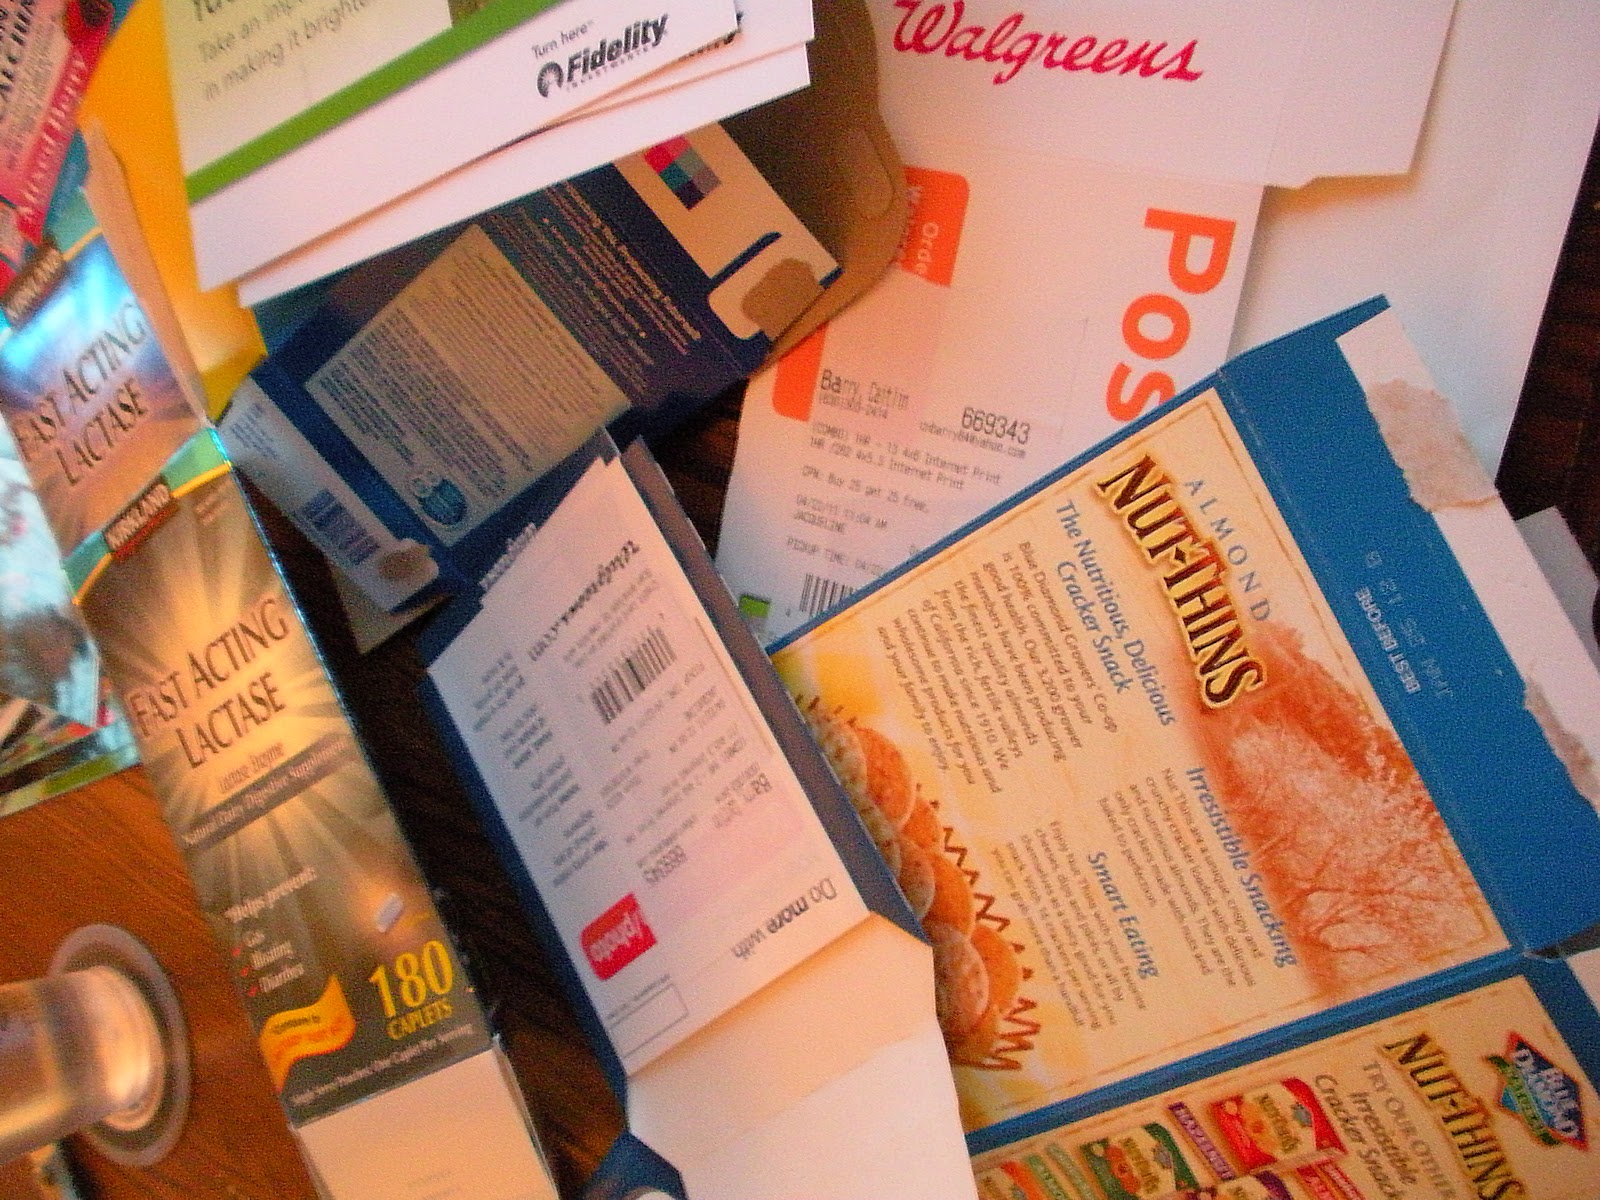
Here's what I was dealing with. Try not to judge.


Here's how I got my life (fine, just my underwear drawer) under control.

First, I found a box that fit in this drawer. I came upon a USPS mailing box in our basement that looked about right. If you do this, make SURE the box you're using fits in your drawer, IN YOUR DRESSER. It would have been so sad if I had made the box all pretty just to find that I had to keep my undies on the kitchen table. 

I cut the lid flaps off the box and kept them around (they wound up coming in handy later).

Then, I got some rando supplies together:


  • A piece of fabric big enough to cover the inside of the box and then some
  • Decorative paper 
  • Decorative tapes
  • Double-sided tape
  • Scissors
  • Stapler

And then I went to work. This project took NO skills (trust me; wasn't interested in devoting too much time to my underwear drawer.) Here are the steps to turning your undies nightmare into a ladylike haven of panties and other female ephemera.

Lay the fabric you've chosen in the box and press it into all four corners--you're lining the box. You can do this any way you want, but I thought it looked nice to have the fabric spilling out over the corners a bit, so that's how I cut the fabric. You can do this as bohemie or as classic as your style dictates.


With the super classy double-sided tape you've gathered, tape the fabric to the insides of the box. Then staple your fabric to the box. ***Make sure to staple with the staple prongs on the OUTSIDE of the box. If you don't, the sharp staple ends will be facing your delicates, resulting in snags and other horrors that you'll surely blame me for. Just keep the staples smooth on the inside, sharp on the outside.You'll cover up those sharp ends with paper.

Then, using double-sided tape, cover the outsides of the box with your decorative paper. I used all the same kind of paper, but a collage-type thing would be cute, too.


With decorative tape, cover all the cardboard edges of the box--this makes sure the paper doesn't start fraying, and it makes it look more finished. (I also used the decorative tape just as decoration in some places). 


Then, fold your fabric over the sides and staple the fabric down in ways that look good to you. Remember to keep the sharp staple prongs on the outside.


Here's what I wound up with:


Now, I had several things I wanted to organize in this drawer: underwear (or underpants, if we want to be hilarious), bras, and tights/leggings. Since I was embarking on a new me via my underwear drawer, I decided to nip possible chaos in the bud by making a matching divider for my box.

I took one of the lid flaps that I cut off earlier, double-taped the heck out of it, and covered it with the same fabric. (Using a complementary fabric would be cute, too). Then I stuck it in the box, and voila: different spaces for different kinds of undies:


Final product? Tights/leggings on the left, bras and underwear on the right. Awesomeness:


Now, even though I've posted my underpants on the internet for everyone and their mother to view, I feel more like a lady. I have an organized place to stash all my unmentionables, and I feel more relaxed about the whole thing.

Also, just saying: I actually did this project about a month and a half ago, and my drawer looks pretty much exactly the same. When everything has a place (and the place looks pretty), it's just easier to keep things organized!